British-style four-in-hand ringing is an interesting and useful skill to add to your repertoire! Playing two handbells in each hand is called “four-in-hand” ringing. Four-in-hand is a useful alternative to shelley ringing for playing two bells an octave apart in each hand. It’s good for passages when the bells of each octave play independently rather than at the same time. It can also be useful for playing four bells as an alternative to weaving, particularly during fast-moving passages of music. In the USA, most handbell musicians learn the “ring and knock” style of ringing. Carla started playing handbells when she lived in England, so she uses the British style of four-in-hand ringing.
What’s the difference between the two styles?
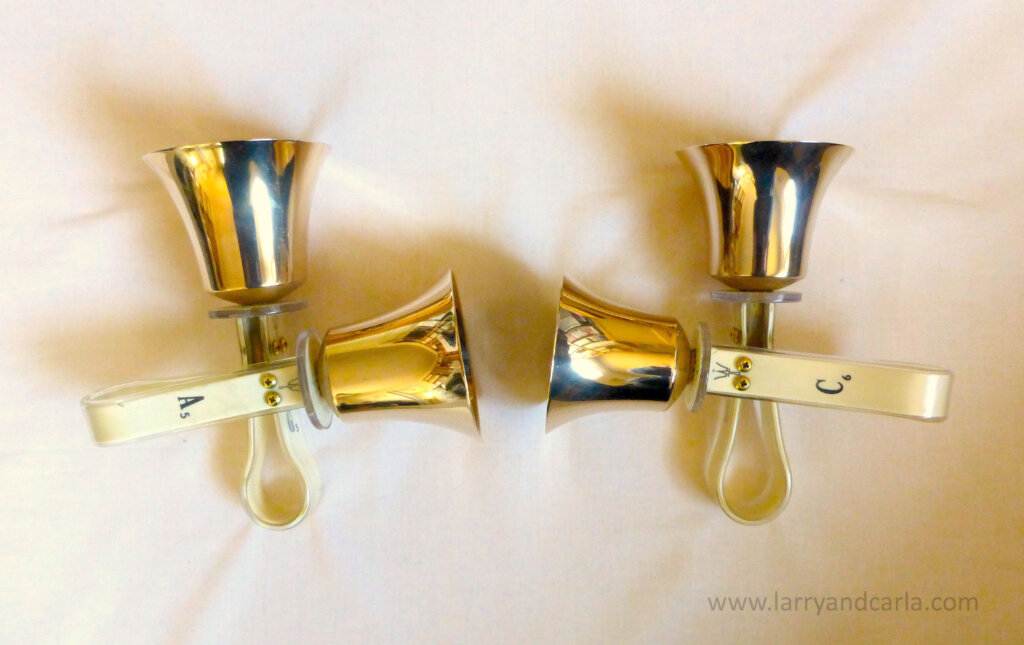
The picture below shows a comparison between the set-up for the “ring and knock” style on the left, and for the British style on the right.

Why choose British-style four-in-hand?
Some people find that the British-style four-in-hand technique is more comfortable than the “ring-and-knock” style more commonly used in the USA. In particular, there is less pressure on the joints of the index and middle fingers, because only the narrower part of the bell handle is between those fingers. Some people prefer this style because the arm movements are more economical, and feel more natural and comfortable for them.
Please note that we usually wear gloves when we play four-in-hand, mainly to protect our hands. This is a matter of personal choice, and many handbell musicians choose not to wear gloves. As long as the bells are wiped down after each use, that’s not a problem. The photos in this article do not show gloves.
Here’s your step-by-step guide:
Setting up the bells
Note: the primary bell is the one between thumb and index finger (the one on top when placed on the table) and the secondary bell is the one between the index and middle finger (the underneath bell when placed on the table).
First, decide on your bell order. In the UK, it’s common to play the bells in consecutive order (usually with the lower bell as the secondary in each pair). For example, G and A would be in the left hand, and B and C in the right. However, some people prefer to play in thirds. In that case, you’d have G and B in the left hand,, and A and C in the right. Playing in thirds has the advantage of making damping easier (or perhaps making a lack of damping less noticeable). However, playing consecutive pairs makes it less likely that you’d have to play two bells in one hand at the same time.
Let’s pause for a moment and think about trills…
If you ever need to play a trill with two bells, holding them in the same hand can make it fun and stress-free!
And back to the subject matter…
Consider how much the bells weigh. Some people prefer to have the heavier bell of each pair in the primary position (between thumb and index finger). It’s an individual choice, and it’s worth taking some time to try both ways and decide which suits you better. If you’re playing bells in octaves, it’s usual to have the heavier bells in the primary position. This allows you to replace the secondary bells on the table easily when they’re not being played. When you need to play them again, you can easily pick them up.
Getting started
Place your secondary bells (in consecutive order, these would be G and B if you have bells G – C, and D and F if you have bells D – G) on the table – with the handles sideways, so that you can see the table through the handles. The bells should be turned inwards so that the sides of the handles that would usually face you when ringing should be facing each other. So, if your bell handles have pictures on, the pictures on the two bells should face each other.

Place each of the primary bells across the top of a secondary bell, with the casting facing inwards and the handle flat, so that the pictures on the handles (if your handles have pictures) are facing upwards.
Playing the bells
Pick up the bells! Place your thumb and index finger on either side of the primary (on top) bell handle, and your other fingers on the other side of the secondary (underneath) bell. Pick up each pair with the handles still resting on each other, as shown in the picture below.

Immediately turn your arms so that your hands are in a “handshake” position. Note that this is different from the “ring-and-knock” position, in that you should not be looking at the back of your hands at this point. The picture below shows the hand position, seen from the “inside”.

Follow these next instructions carefully!
Raise your arms enough so that the secondary bells (farthest away from you) are playable using the normal ringing stroke. Remember not to drop the bells down as you play, but to keep the sides of the castings facing toward the (real or imaginary!) audience in front of you. When you’re new to this style, you may find that you have to bend your wrists slightly inwards to play your secondary bells, and that’s okay. Sometimes, at this point, it helps to imagine that the primary bells aren’t there. Just ignore them and practise playing the secondary bells in the usual way.
Your primary bells (now the ones closest to you) can be played using an inward stroke. Remember that you should still be aiming for a circular motion. Think of it as an inward-and-upward scoop, rather than a downward movement. As you become more familiar with this style, you may find that you can turn your arm slightly (so that the back of your hand faces you more). This will enable more of a forward movement with your primary bell when playing longer notes.
Playing two bells in the same hand at the same time
To get both bells to sound at the same time, aim for a more diagonal inward stroke – the midway point between each bell. That should enable you to find the “sweet spot” where both bells can sound at once. With some bells, particularly the smaller ones, sometimes it’s enough simply to squeeze the fingers of your hand, and both bells will play at the same time. This can take a bit of practice!
Some UK handbell musicians prefer to use an outward stroke instead of an inward one to play the primary bells. It’s a matter of personal preference, but if you choose this way instead, you’ll probably need to rotate each of the primary bells so that the picture on the handle is facing the other way.
Note: Interlocking the handles is another option, and can sometimes help when playing heavier bells – but this is fairly uncommon in the UK, because the shape of the traditional leather handles often doesn’t allow it. Always bear in mind your own comfort and safety, and don’t use four-in-hand for bells that feel too heavy for you.
Damping the bells
Even though you’re holding four bells, it’s still important to know how to damp those bells when necessary. Note that it’s not essential or desirable to stop the sound after every individual note. Creating a legato sound is important too, and too much damping can interfere with that. If you have to choose between damping a bell and playing the next note, it’s often preferable to play the note first and worry about damping the other bell afterwards. This is sometimes called “lazy damping” or “sloppy damping”.
You should damp your bells in a way that feels comfortable for you. The primary bell can often be damped on or near the chest or shoulder. You can damp the secondary bell somewhere near your waist, or on your side or hip. You could also damp the secondary bell on a (padded) table if time allows. However, that can look clumsy and have an effect on the sound produced, so be careful. Obviously, that technique won’t work if you don’t have a table in front of you! Thumb damping and finger damping are also possible – see the paragraph on “stopped sounds” below.
The general rule would be to listen to the music, be aware of unintentional dissonances, and “damp the bell if it’s starting to sound horrible”. With practice, you’ll recognise when damping is a good idea and when it’s okay for the bell to ring on, undamped.
Stopped sounds
Stopped sounds such as martellato and thumb-damping are still possible with this four-in-hand method.
For martellato (assuming that you have a foam-covered table in front of you!) – the bells can be pushed into the foam individually quite easily. However, it can be a challenge to mart both bells in the same hand at the same time, as the clappers are facing in different directions. A more reliable method is to turn the secondary handle so that the bells are in shelley position (with the pictures on the handles facing upwards), and that will make it easy to mart both the bells together. You can easily turn the handle back afterwards, if you need to continue playing four-in-hand.
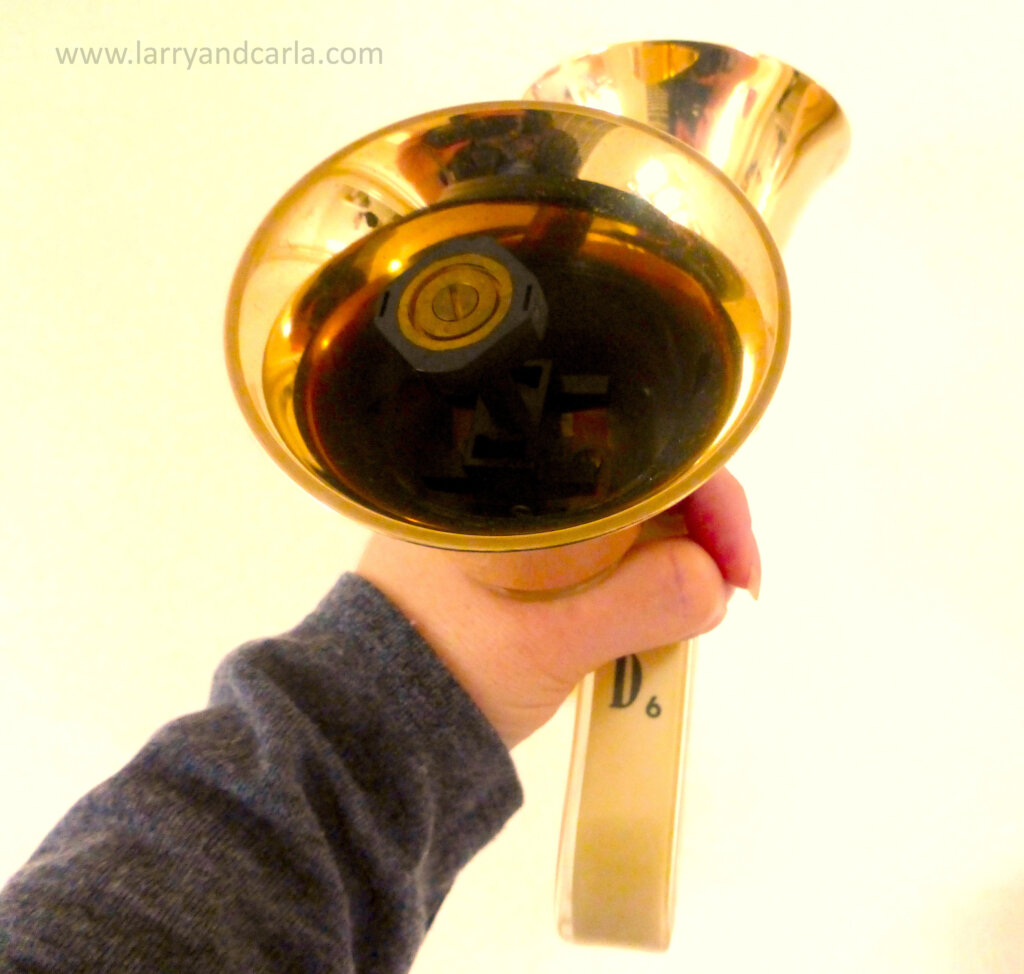
Thumb- and finger- damping are also possible. You can thumb-damp the primary bell (the one closest to you) as the picture demonstrates:
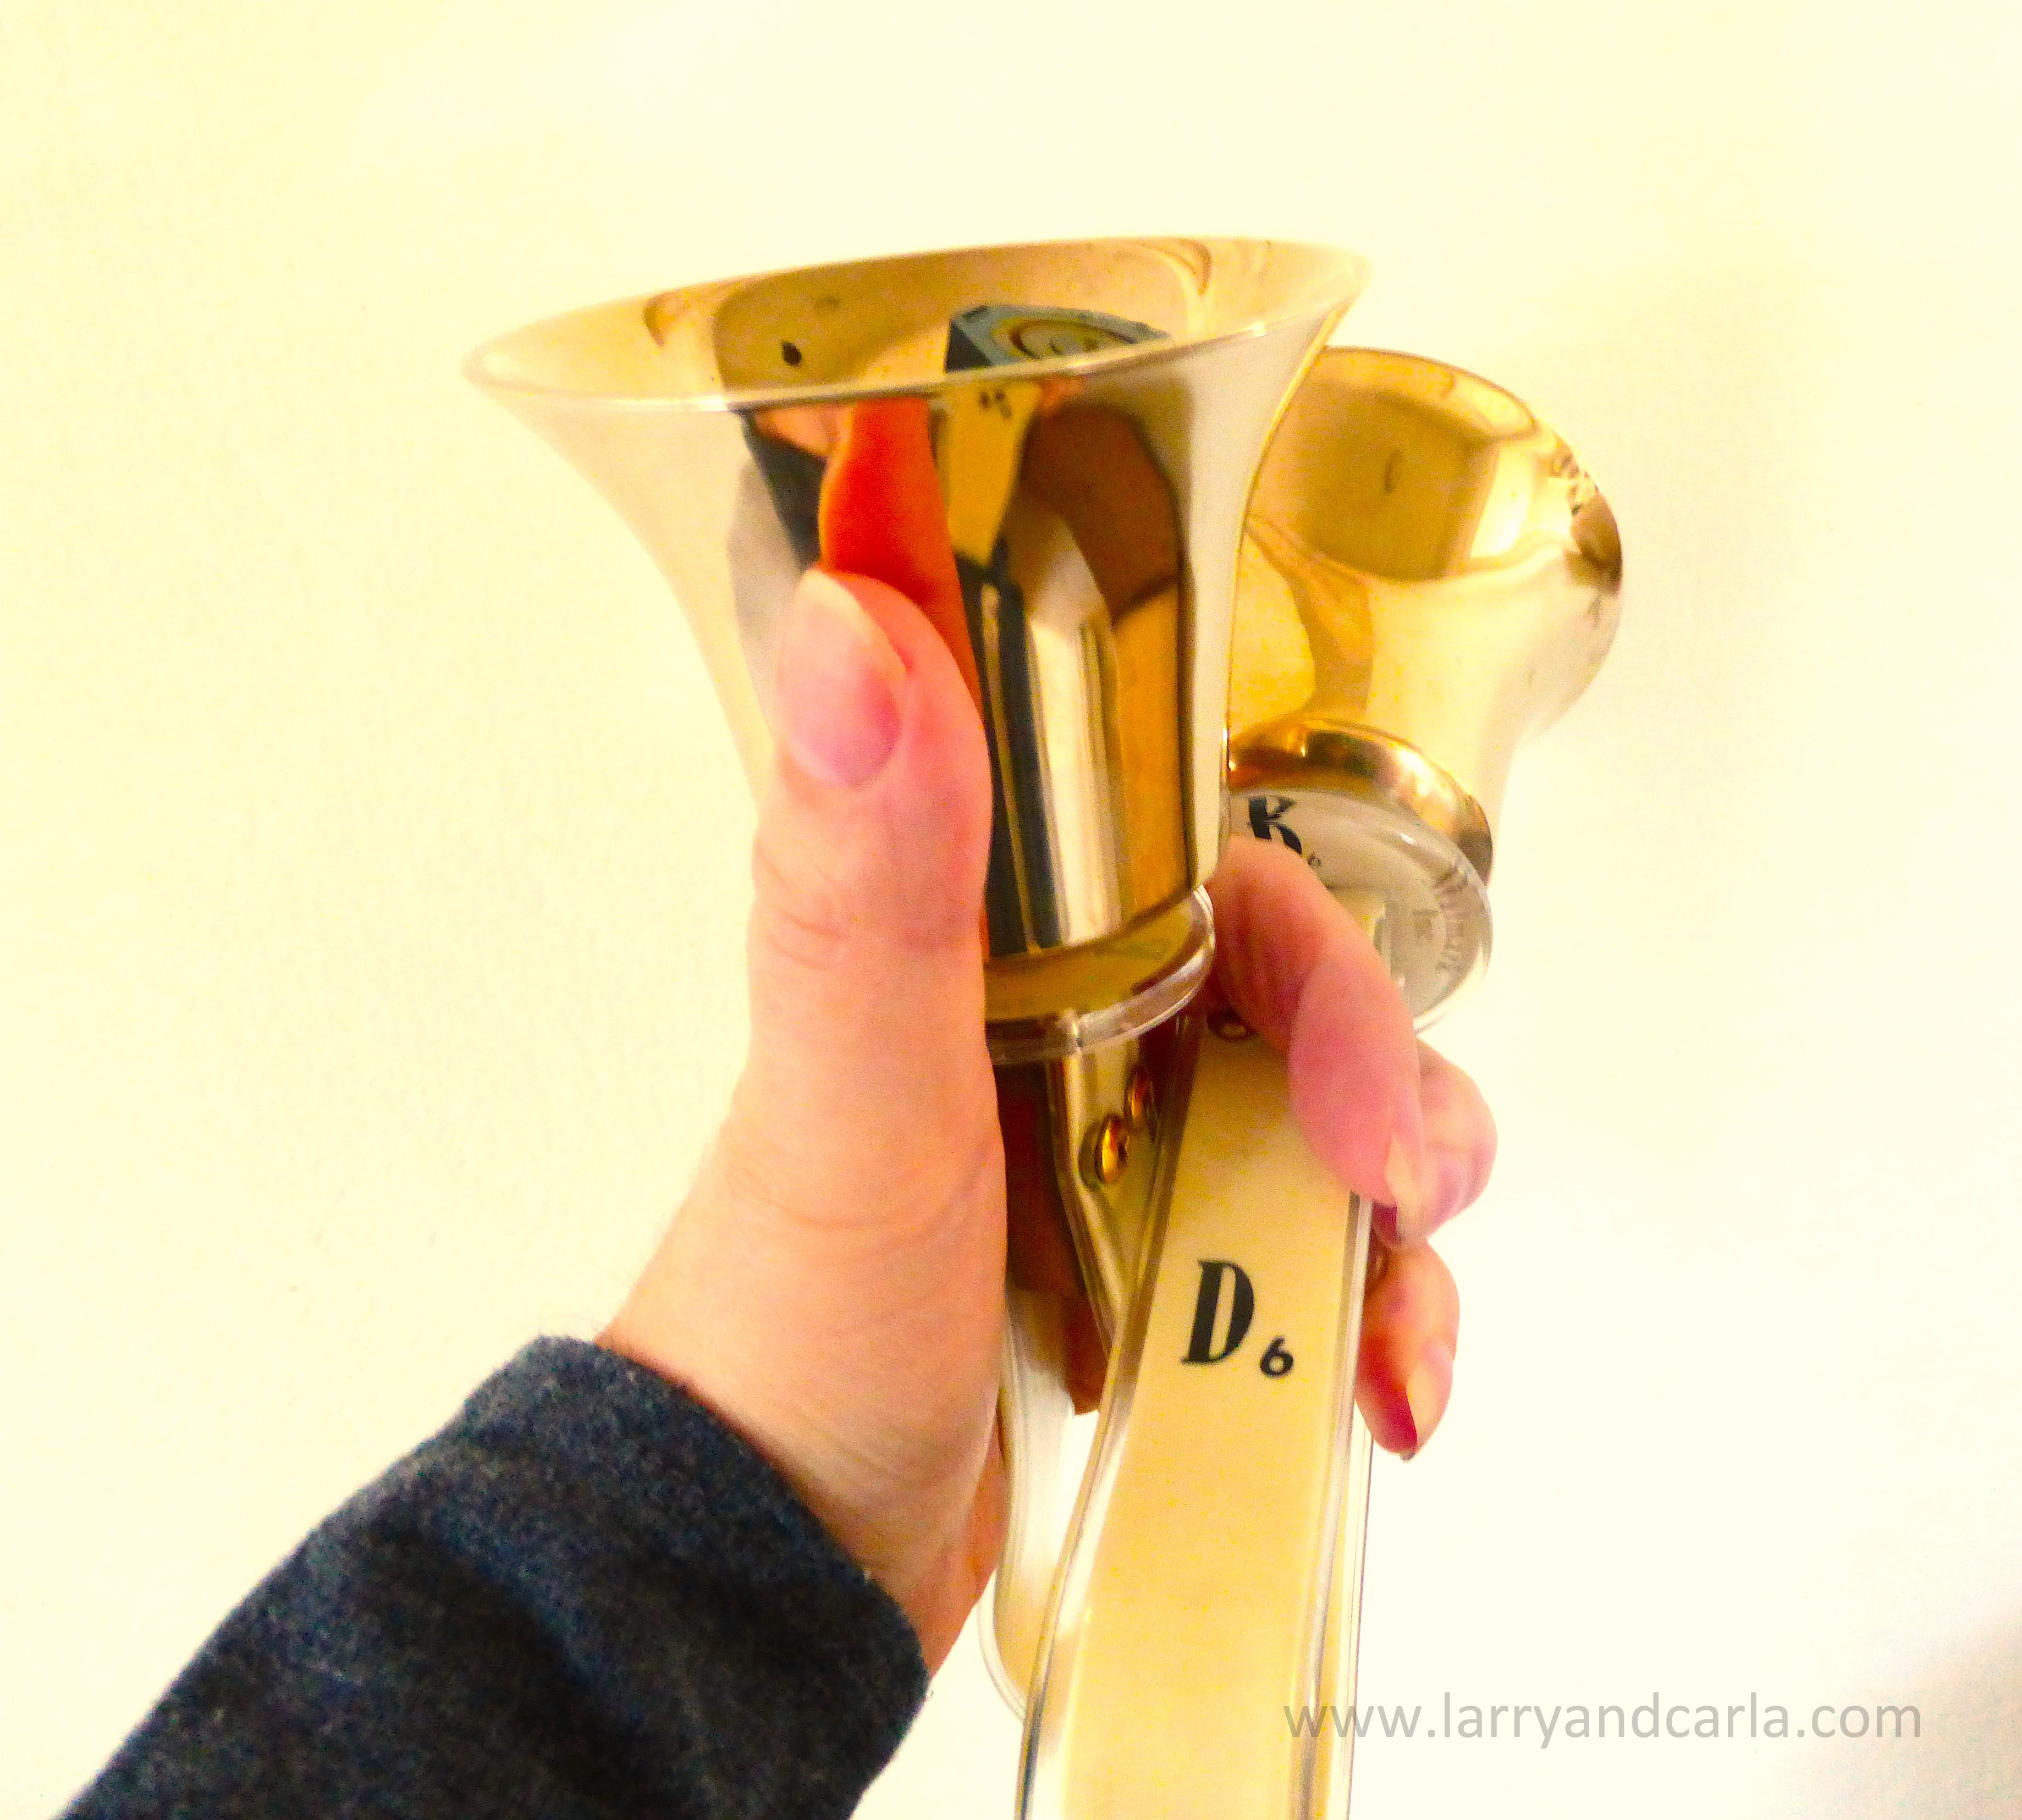
You can “thumb-damp” the secondary bell using your index finger, like this:
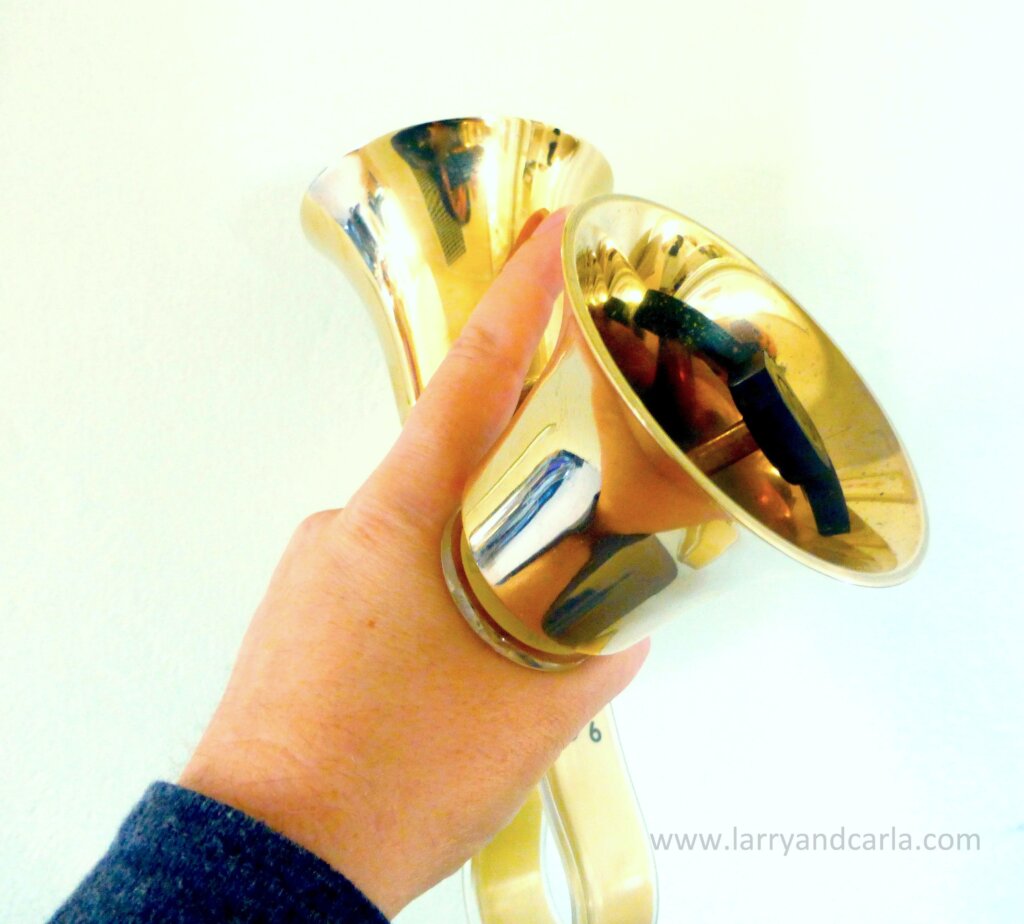
When playing passages of music that call for continuous thumb-damping, it’s often easiest to hold the bells using the same four-in-hand method, but with the hands around the metal castings instead of the handles, as shown below:

Desperate measures!
If you’re new to British-style four-in-hand ringing, and you find yourself staring blankly at the music, struggling to remember in which direction to move your arms – you may find it helpful to use the tried-and-tested method of marking your music with coloured lines. Pick a different colour to represent each hand – for example, red for left and green for right. Next, grab a couple of coloured pens or crayons. Draw a vertical line through a note if it’s played in the secondary position, and a horizontal line through a note that’s played in the primary position. Use the corresponding colour for each hand, and your music will end up looking something like this:
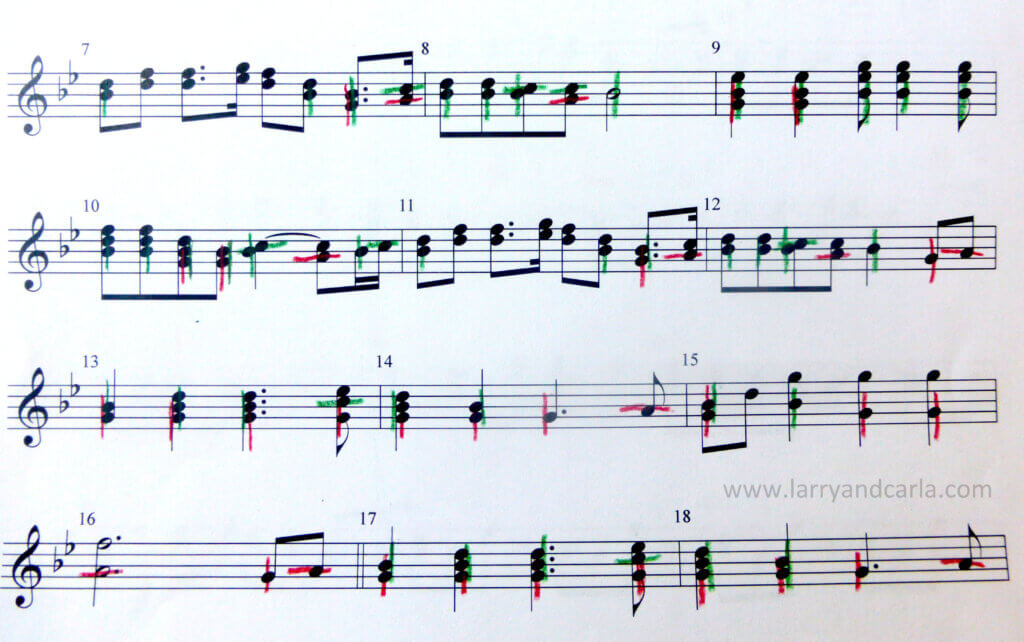
Opinions vary as to whether marking your notes like this is a good thing or not. It’s helpful for some people, at least as a temporary measure while they’re learning 4-in-hand skills. Other people think pencil marks like this only add to their confusion! The aim should be to practise enough so that eventually you won’t need the markings any more. We’d recommend that you try not to rely on coloured markings on a long-term basis (or at all!). Instead, continue to work on recognising the notes and matching them to your arm movements. It takes practice, but it’s worthwhile!
Any questions? Please contact us and we’ll do our best to help!

© Larry and Carla Sue
